
Keeping your home in good condition may seem like a big challenge; however, with some basic knowledge and an organized approach, it is possible to solve small repairs home without having to hire a professional. In addition, repairs such as leaks, peeling paint and adjustments to outlets can be carried out in a simple and economical way. Therefore, in this complete guide, you will learn how to perform small home repairs, following good practices to ensure the safety and efficiency of the repairs. This way, the reader will be able to save time and money, avoiding major problems.
1. How to Identify and Fix Leaks at Home
First of all, water leaks are one of the most common problems in homes and, consequently, can cause damage if they are not fixed in time. For example, a small leak can significantly increase the water bill and even cause structural damage to walls and floors. Therefore, it is essential to learn how to identify these leaks as early as possible.
1.1 How to Detect Leaks
To begin, check for moisture stains on walls, ceilings or floors, as these stains usually indicate the presence of infiltrated water. Also, pay close attention to whether there are sounds of running water, even when all the taps are closed. Also, don’t forget to check the water meter: close all water outlets and, consequently, check if the meter continues to turn. This way, you can quickly identify the source of the problem and prevent further damage.
On the other hand, if you notice that cracks in the walls are increasing or that moldy odors have appeared, it is essential to act immediately, as these signs indicate that humidity is compromising the structure of your home. Thus, early detection of leaks not only reduces water bill costs, but also protects assets.
1.2 Fixing Leaking Faucets
If your faucet is dripping, the problem may be with the internal seal. So, here’s how to fix this situation:
- First, turn off the water supply to prevent the leak from getting worse while you carry out the repair.
- Next, use a wrench to carefully disassemble the faucet.
- Later, identify and replace the rubber seal with a new one, making sure it is compatible with your model. faucet.
- Finally, reassemble the part and test to confirm that the leak has been eliminated.
This way, even if the problem is simple, you will avoid wasting water and reduce the risk of greater damage to the structure of your home.
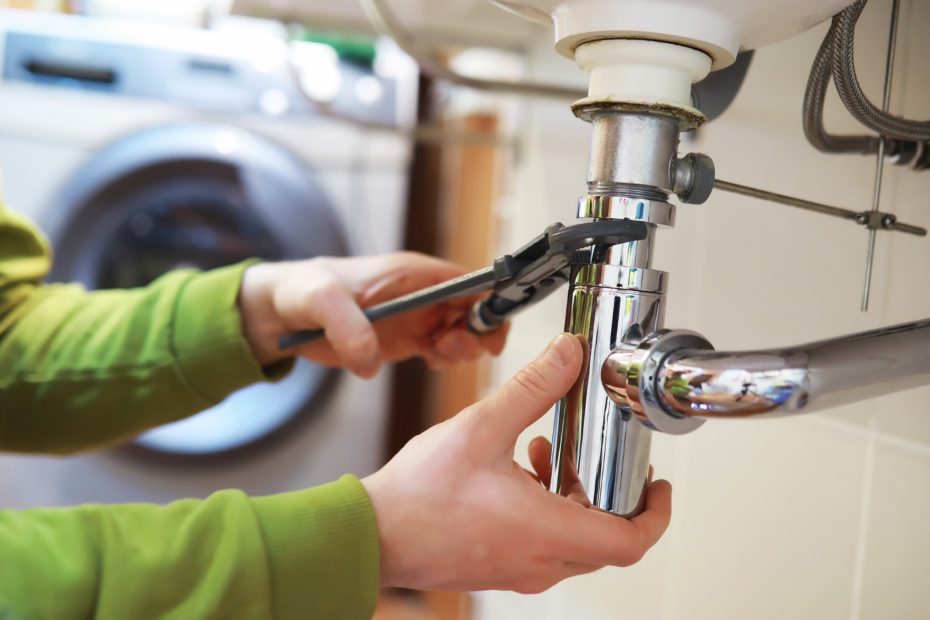
1.3 Fixing Leaks in Pipes
When there is a leak in an exposed pipe, you can opt for a temporary solution that uses thread sealing tape or self-taping tape. fusion. In general, this measure works well to contain the problem until a definitive repair can be carried out. However, it is important to note that this is only a temporary solution, as the integrity of the pipe may be compromised and, therefore, an evaluation by a professional will be necessary later.
In addition, for embedded pipes, it is recommended that you hire a specialist, as inadequate intervention can worsen the problem. Therefore, although it is possible to carry out small repairs on your own, whenever there are doubts or risks, consulting a professional becomes essential.
2. Minor Paint Repairs
Over time, it is natural for the paint on your walls to deteriorate, peeling or staining due to exposure to sunlight, humidity and wear. Therefore, before repainting, it is essential to prepare the surface properly. This way, you ensure a uniform and long-lasting finish.
2.1 Necessary Materials
Before starting the paint repairs, make sure you gather all the necessary materials, as this will make the process easier. So, you should separate:
- Running putty or plaster;
- Wall sandpaper (preferably number 150 to 220);
- Paint roller and brush;
- Paint suitable for the environment, taking into account the humidity and the type of surface.
In addition, it is important to have a damp cloth and masking tape available, as these items can help protect areas that will not be painted.
2.2 Step-by-Step Guide to Small Paint Repairs
First, prepare the surface by removing loose paint with a putty knife or sander, if necessary. Then, sand the affected area so that the new layer of putty or paint adheres better to the wall.
Next, apply the filler over the imperfections, ensuring that the layer is thin and well distributed. This way, the imperfections will be corrected and the wall will be ready to receive the new paint.
Later, after the putty has completely dried, sand it again to even out the surface. This will leave the wall smooth and ready to receive the paint.
Finally, paint the wall with the desired color, applying at least two coats to ensure a uniform and long-lasting finish. This way, in addition to renewing the look of the room, you protect the wall against future deterioration.
In addition, if there are areas with difficult stains, it may be useful to use a primer before applying the paint, as this ensures better adhesion and uniformity in the final color.
3. Repairing Outlets and Switches
In addition to repairing leaks and painting, it is common for outlets and switches to malfunction over time. Consequently, problems such as poor contacts or loose wires can compromise the safety of the home.
3.1 How to Replace an Outlet
First, to safely replace an outlet, turn off the power at the main circuit breaker. This will help you avoid electric shocks and ensure a safe environment for the repair.
Next, remove the screws that hold the old outlet to the wall and carefully disconnect the wires. Then, connect the wires to the new outlet, making sure that each wire is in the correct terminal.
Finally, screw the new outlet into the wall and turn the power back on. This will help you verify that the repair was successful and that the new installation is working properly. So, even if the problem is simple, the proper procedure ensures the electrical safety of the environment.
In addition, if you notice signs of wear or oxidation, it is recommended to check all electrical wiring, as this may indicate more serious problems that require professional attention.
4. How to Fix Warped Doors and Windows
Therefore, wooden doors and windows can warp over time due to changes in humidity and temperatures. As a result, the surfaces can become misaligned, making it difficult to open and close properly.
To solve this problem, first identify the areas that are causing friction or that are out of standard. Then, use sandpaper to smooth out the excess areas so that the door or window fits better in the frame.
In addition, apply a layer of varnish or protective paint over the wood, as this helps to seal and protect the surface against moisture. This way, not only is the repair carried out, but the durability of the door or window is also increased.
On the other hand, if the warping is very pronounced, it may be necessary to replace some components of the wood. Therefore, although small corrections can be made on your own, more serious problems should be evaluated by a professional.
5. Safety Tips for DIY Repairs
Before starting any repair, it is essential to follow some safety measures. First of all, always turn off the power when carrying out electrical repairs, as this prevents serious accidents. Additionally, wear protective gear such as gloves and safety glasses, especially when handling chemicals or sharp tools.
Furthermore, when working with paints and solvents, make sure the environment is well ventilated. This way, you avoid inhaling harmful vapors and maintain the air quality in the area. Consequently, safety measures should always be prioritized to protect your health and the integrity of your home.
In addition, it is advisable to read the instructions for the products used and, if necessary, consult reliable tutorials or ask for the opinion of a professional. This way, you will minimize risks and ensure an effective repair.
6. Extra Tips for Efficient Home Repairs
In conclusion, it is important to emphasize that organization and planning are essential for the success of home repairs. Therefore, before starting any repair, draw up a small action plan, listing all the necessary materials and the steps to follow.
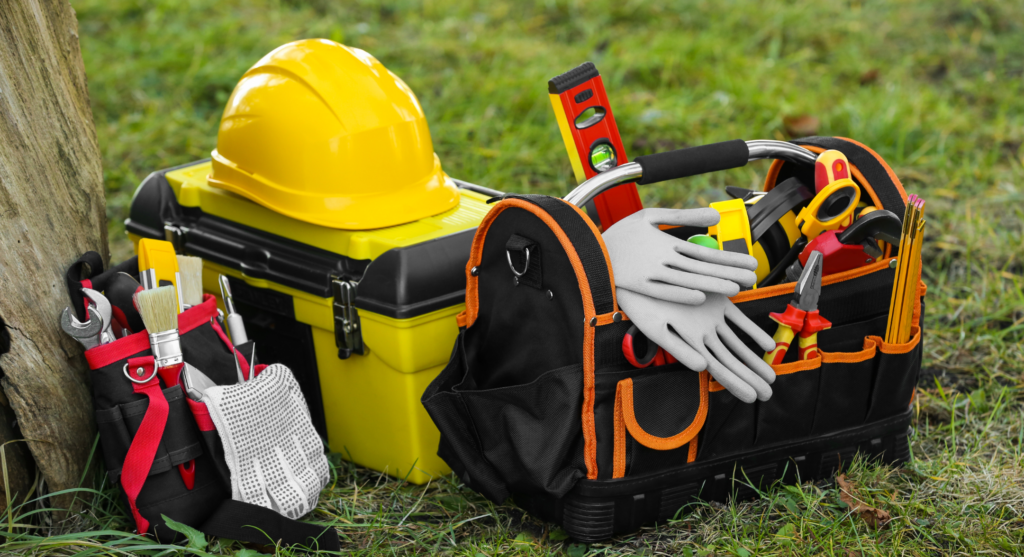
On the other hand, always keep a basic tool kit at home, including screwdrivers, pliers, wrenches, and other items that may be useful in various situations. This way, you will always be prepared to solve small unforeseen problems.
Furthermore, if you realize that a repair is beyond your capabilities or if doubts arise during the process, do not hesitate to seek the help of a professional. After all, although the idea is to save money and carry out the repairs yourself, safety and quality of the work should be priorities.
Conclusion: Small Home Repairs
In short, carrying out small home repairs at home can be simpler than you imagine. With the right tools and techniques, you can fix leaks, repaint, and fix problems with outlets or doors, all of which help keep your home in perfect condition. This way, you not only save money, but you also gain the autonomy to solve everyday unforeseen problems.
Furthermore, by following safety guidelines and using transition words to organize your ideas, the repair process becomes more systematic and less stressful. So, now that you know the fundamental steps to solving small problems, how about getting your hands dirty and trying out these tips?
Consequently, with planning and attention to detail, each repair becomes an opportunity for learning and improvement. Finally, if you have any questions or would like to share your experiences, don’t hesitate to leave a comment. Thus, the exchange of information can benefit other readers who also seek to keep their homes in ideal conditions.
So remember: regular home maintenance not only preserves the aesthetics of the property, but also contributes to the safety and well-being of all residents. Furthermore, by adopting these practices, you will be able to identify problems early, avoiding more expensive and complex repairs in the future. In short, small home repairs are smart investments that provide long-term benefits.